fbpx
Categories
Micro_Inverter

Microinverters: Do you really need it?

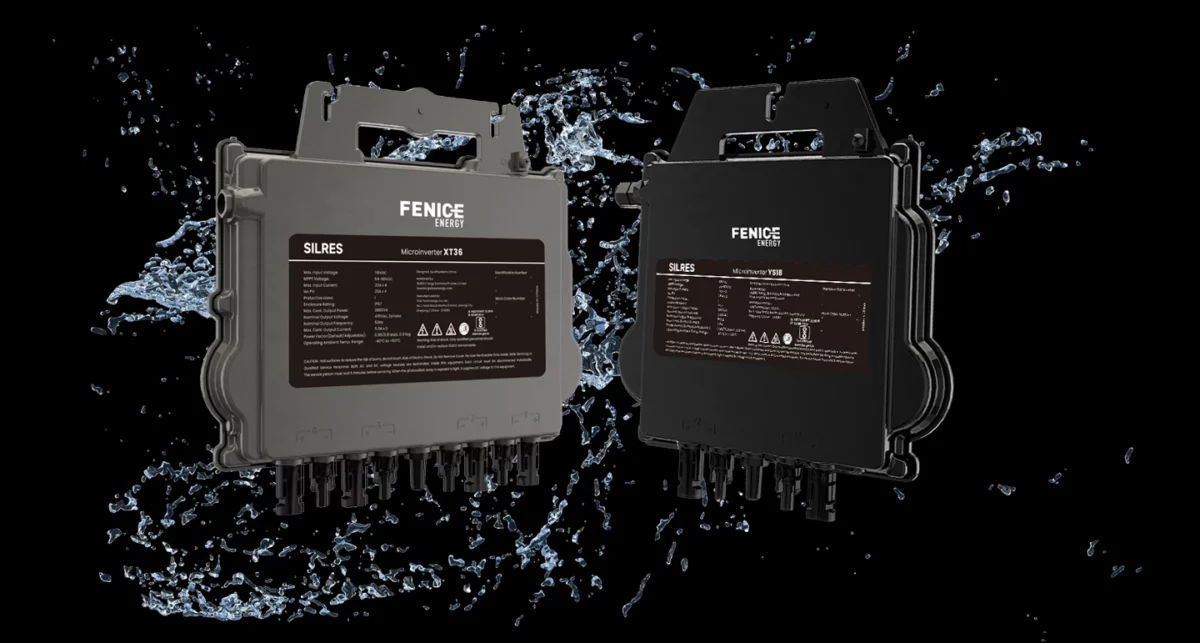
What are Microinverters? 

In many cases, experts may suggest installing solar panels with micro inverters. Before you decide to install one, you must ask what is a microinverter? Microinverters are compact devices that stay mounted directly onto individual solar panels. They handle the critical task of converting the direct current (DC) electricity produced by each panel into the alternating current (AC) electricity that powers your home. This conversion process is essential because solar panels generate electricity in DC form and most household appliances require AC electricity to operate. By integrating microinverters into your solar setup, you ensure that the energy harvested by each panel is transformed into a usable form.

Are Micro Inverters Worth it?

There are many benefits of installing solar panels with micro inverters. Here are a few:

Individual Panel Optimization

Micro inverters in India optimise the performance of each solar panel independently. Unlike traditional string inverters, microinverters ensure that each panel operates at its maximum efficiency. This means that shading, dirt, or malfunctions affecting one panel won’t impact the output of the entire system. As a result, it will result in higher overall energy production.

Real-Time Monitoring

Many microinverter systems offer built-in monitoring capabilities. This allows homeowners to track the performance of each panel in real-time. Through user-friendly interfaces or smartphone apps, you can easily monitor energy production, identify potential issues, and assess the overall health of your solar system. Therefore, homeowners can address any issues promptly and maximise system uptime.

Flexible Installation

Microinverters simplify the installation process and offer greater flexibility compared to traditional inverters. Each microinverter is installed directly on its corresponding solar panel. This eliminates the need for complex string configurations or positioning considerations. It will allow you to customise your solar array to fit in the available roof space.

Scalability

With microinverters, you can easily expand your rooftop solar installations over time. Since each panel operates independently with its own microinverter, adding new panels to an existing system is straightforward. It will allow you to start with a smaller system and gradually expand it as your energy needs. You do not have to worry about costly upgrades.

Safety Features

Microinverters operate at lower voltages compared to traditional inverters. Therefore, it will reduce the risk of electrical hazards during installation, maintenance, and operation. Additionally, the modular design of microinverter systems minimises the impact of potential failures. If one microinverter malfunctions, the rest of the system remains unaffected. You can ensure continuous energy generation and system reliability.

High Reliability

Microinverter systems enhance the reliability of solar energy installations. Since each panel operates independently, the failure of one microinverter does not compromise the performance of the entire system. This ensures consistent energy production over time. Even during failures or adverse environmental conditions, you will not face power cuts.

Optimised Energy Harvesting

Microinverters incorporate Maximum Power Point Tracking (MPPT) technology for each individual panel. MPPT algorithms continuously adjust the electrical output of each panel to maximise energy harvesting, even under changing environmental conditions. By optimising the power output of each panel, microinverters ensure that you can extract the maximum energy from solar arrays. It will enhance the overall system efficiency.

Compatibility with Complex Roof Configurations

Microinverters are well-suited for installations on roofs with complex configurations, shading issues, or panels oriented in different directions. Since each panel operates independently, microinverters mitigate the impact of shading or orientation problems. You can ensure optimal energy production even in challenging environments. This is one of the main benefits that make microinverters a preferred choice for installations.

How to install solar panels with micro inverters?

Installing solar panels with microinverters involves several steps. These steps must be followed to ensure efficient energy production and system safety. 

Assessment and Planning

Before diving into installation, assess your property’s solar potential. Factors such as roof orientation, shading, and local regulations play crucial roles. Conduct a site survey to determine the optimal locations for solar panel placement. Take measurements and note any obstructions that might affect panel placement and performance.

Selecting Equipment

Choose high-quality solar panels and microinverters suitable for your energy needs and budget. Opt for reputable brands known for durability and performance. Ensure compatibility between the panels and microinverters to maximise energy production. Consider warranty, efficiency ratings, and certifications when making your selections.

Acquiring Permits and Approvals

Obtain necessary permits and approvals from local authorities before proceeding with installation. Regulations regarding solar panel installations vary by location, so familiarise yourself with the requirements in your area. 

Preparing the Installation Site

Clean the installation site and ensure the roof surface is structurally sound to support the weight of the solar panels. Remove any debris or obstacles that may obstruct the installation process. If necessary, reinforce the roof or make repairs to ensure a secure foundation for the solar array.

Mounting the Racking System

Install the racking system securely onto the roof following manufacturer guidelines and local building codes. Use appropriate hardware to attach the racking system to the roof structure. Make sure that penetrations are sealed to prevent water leaks. Also, the racking system must be properly aligned and levelled.

Wiring and Electrical Work

Connect the microinverters to the solar panels using the provided cabling according to manufacturer instructions. Pay attention to polarity and ensure proper grounding to comply with electrical safety standards. Then, run wiring from the microinverters to the main electrical panel.

Testing and Commissioning

Once the wiring is complete, conduct thorough testing to ensure proper functionality of the entire system. Test individual components, including panels, microinverters, and electrical connections, to identify any issues or discrepancies. Verify that the system is generating electricity as expected and troubleshoot any problems encountered during testing.

Grid Connection and Final Inspection

Coordinate with your service provider to connect your solar system to the grid. Obtain any required approvals or permits for grid interconnection and net metering arrangements. Schedule a final inspection to ensure compliance with local regulations and safety standards. Once the system passes inspection, you can start enjoying the benefits of solar energy.

Although this may seem like a simple process, it is best to hire experts for the installation. It will eliminate the risk of faulty installations and ensure that you do not face any issues in the future. 


Categories
Green Energy Micro_Inverter Rooftop Solar

How to protect your solar panels from lightning?

In the previous article, we have defined some environmental factors that solar installers are stressed over. During the rainy season, installers are concerned about the storms and lightning impacts as they are the major calamitous failure of the solar panel system. The time and cost incurred in repairing the damage due to the indirect and direct strikes are high, hence prior protection against these damages is worth the investment. The article below describes some of the easy techniques that one can implement to protect against these damages.

Lightning strikes are mostly classified as direct and indirect strikes.

Direct Strikes are severe but rare, it leads to melting of the panels and damage to the inverter, fuses, and cable. It induces high current into the system, thus causing overheating and damage to the system. An indirect strike occurs more often, it creates electromagnetic induction that generates high voltage into the solar system and house. The generated high voltage passes through the system wiring to the components, thus damaging the conductor, solar panels, inverter, and other components connected. But don’t worry! We take steps to help avoid lightning damages to the PV system. Risk analysis and protection against lightning must be done according to the IEC standard (we have further described the IEC standards for protection against lightning strikes) at the designing stage.

Two main solutions to protect against the lightning strike:

1. Grounding 2. Lightning arrestor

Grounding:

Grounding is one of the basic techniques used to divert the path of lightning from the component straight to the ground. For places with occasional lightning strokes, the grounding technique is enough to protect the PV system from lightning and surges (without adding any other protection equipment). Good grounding is very necessary, even if we use lightning arrestors and surge protectors it will work effectively only with proper grounding.

For proper grounding one needs to follow the following points:

1. Check the resistivity of the ground: Electricity flow handling capacity. Article 250 (the article specifies the requirement of grounding and bonding) and article 690.41 (the article specifies solar PV electrical energy system) of the National electrical code (NEC) specify grounding requirements. 2. Interconnect all the PV panels, inverter, controller, and all the other components to the common ground along with the house grounding system to the common earthing point. We need to install one earth pit for the DC side (solar panels, DC distribution box) and one for the lightning arrestor and AC side (inverter, AC Distribution Box). 3. For proper and effective grounding, the use of copper / Aluminium wire / GI strip is highly recommended. The wire/strip used should be free from sharp bends and twists and should be buried in a way such that most of the area comes in contact with moist soil.

Do we need to install other protective equipment to protect against lightning?

Adding protective equipment depends on the location and environmental condition. It is recommended to install additional lightning protective devices under the following circumstances: 1. If the solar panel is installed in the lightning prone location 2. Presence of heavy metal objects such as water tanks, solar thermal heaters, satellite antennas, etc. 3. Length of wire larger than 100m 5. Dry soil with poor conductivity Let us check the lightning protection system in detail. The lightning Protection system is categorised as follows:

External protection systems

External protection systems are used to protect the solar rooftop system from direct lightning strikes. This type of protection system gets activated only when lightning strikes over the solar system, thus protecting solar panels and other equipment associated with it.

1. Air termination system

An air termination system is installed to protect the building from uncontrolled lightning strikes. The system consists of cables, spanned wires, and conductors. A correct design, dimension with more attention towards the corners and edges allows better protection against lightning. Design methods commonly used for air termination systems are: Mesh Method – It is used for the flat roof structure Rolling Sphere – It is the universally used method for all types of structure Protection Angle Method – It is preferred for single masts and finials type structures. For solar energy systems, the protection angle method is recommended.

2. Down conductors

The down conductor act as a conductive connector between air and earth termination systems. It allows the passage of lightning current to the earth termination system and provides the shortest and least resistant path to the current. For proper protection, down conductors should match the following guidelines: The down conductor should offer several short distances parallel current paths. A high voltage insulated down conductor is installed to ensure proper protection and separation distance from other conductive components. Conductors should be evenly distributed. The number of conductors required depends on the rooftop external edges area, so a proper calculation must be done.

3. Earthing termination system

Earthing termination system is installed to avoid voltage-rise in the earthing system, it helps in discharging the surge current to the earth. For effective discharging, it is recommended to use a low-frequency electrode offering a low resistance path to the earth and resistance to corrosion.

Internal Lightning Protection System(LPS)

To protect the building structure against indirect strikes, internal LPS is used. It is done in the following ways:

1. Lightning equipotential bonding –

It reduces the voltage difference by connecting the different isolated parts of the system using conductors or surge protection devices with the help of IEC 60364-4-41 standard(It defines the essential requirements related to protection against electric shock, direct and indirect contact of persons and livestock) Dangerous sparking is prevented by keeping an appropriate distance between the electrical conducting components and lightning protection equipment.

2. Surge (Lightning) protection device –

Surge protection devices are a part of the lightning protection system. The primary function of SPD is to limit transient overvoltages of atmospheric origin below the set hazardous value and divert current waves to the earth to protect the electrical installation system. In solar energy systems, SPDs are installed in ACDBs (AC distribution box) and are inbuilt in Inverters as well. Lightning rods are placed on the building top and are connected to the ground, they help in preventing the surrounding atmosphere from the static charges. In the case of lightning, the developed high current will pass to the ground directly.

IEC standards for lightning protection

The International Electrotechnical Commission (IEC) defines guidelines for all electrical, electronic and other similar technologies. BS EN/IEC 62305 defines guidelines in consideration of lightning protection, it is divided into four major parts: 1. General principle 2. Risk management 3. Physical damage to the structures and life hazard 4. Electrical and electronic systems

Lightning protection for residential rooftop solar consumer – key points

The following points should be taken into consideration while building a lightning protection system for rooftop solar models: 1. Install lightning rod at the topmost point in the location where the solar energy system is installed. 2. The DC connection of the PV system should be kept at a reasonable distance from the metal components on the roof. 3. Ensure AC distribution box and inverter consists of a surge protection device. 4. Make sure down conductors are not rusted(as it increases the resistivity) and earthed properly.

Categories
Electricity Solar

Ways to save on electricity bills​

Ways to save on electricity bills​

Reducing electricity bills and saving as much as possible is a common concern for most residents in India. Especially in cities like Delhi, surviving the heat during summers is close to impossible without an air conditioner. Similarly, during winters, heaters, and geysers are consumed constantly. In more humid temperatures like Chennai, refrigerators are needed to prevent food articles like milk, and bread from getting spoiled.

One way or the other there are electronic appliances such as refrigerators, geysers, heaters, air conditioners, dishwashers, and washing machines that happen to consume the most power whether you go solar or not.

One of the common misconceptions is that solar will bring down your electricity bills to zero. Solar definitely does cut down your electricity bills considerably, however, it also requires you to use your appliances smartly.

Most consumers want to know how electricity can be consumed in a smart way post going solar. Below are some quick tips that will help you achieve that. These tips require minimal effort but will help make a significant difference in your final electricity bill amount.

1. Switch to low-consuming LED lights. They are the most energy-efficient.

2. Smartly using light requires minimal effort but will make a considerable difference in your electricity bill.

3. Consider turning off unwanted lights when a room isn’t in use.

4. Use task lighting – lights that are appropriate for the task it is being used for like a reading lamp would be a better option rather than a tube light for the entire room.

5. An article in Times of India says, “Dust your tube lights and lamps regularly. Dirty tube lights and bulbs reflect less light and can absorb 50 per cent of the light, Fluorescent tube lights and CFLs are five times more efficient than ordinary bulbs and thus save about 70% electricity.”

6. Setting air conditioners at 25°C will significantly reduce your electricity bills.

7. Another smart decor tip is shading your home’s windows and walls, which will again reduce the AC’s energy consumption by 40%.

8. In terms of refrigerator use – one of the most common mistakes made is overloading the fridge with multiple items, preventing continuous airflow around the refrigerator.

9. Allow enough space for airflow.

10. Electronic gadgets consume more energy, especially when they are left turned on charging. Turning them to sleep mode, will help cut energy costs by 40%.

In addition to all of this, regular cleaning and maintenance of all your appliances will help them function more efficiently bringing down your overall energy costs. To begin your journey with solar, reach out to us? Let’s Talk.

Categories
Rooftop Solar Solar Solar Energy Solar Panels

How to install solar panels for free electricity in 6 simple steps?

How to install solar panels for free electricity in 6 simple steps?

One of the biggest myths about solar panel installation is that it is a tedious and long process. Not to mention expensive. But the fact is installing solar panels is a simple and easy task but surely it requires a skilled installer to install the solar panel at your location.

While researching frequently asked questions, there were innumerable ones we came across on:

1. Time

2. Money

3. Customer service

This article is aimed to break that myth for you. We’d like to take you through a step-by-step guide that will shed light on the processes involved at every stage. Right from the time, a potential customer reaches out to us, up until the post-installation service too.

What are the prerequisites for solar panel installation at your location?

As a customer, before going for solar installation and its design one must check the below points:

1. The amount of electricity required

2. The shadow-free area available on your rooftop

3. The peak sunshine hour in your area

4. Type of solar panel suited for your location as per your design requirement

5. One must also check the available government incentives for the particular location.

Once we have identified the above factor, the next task is to design the solar plant and its installation.

Installation of a solar energy system requires skilled labour to avoid any damage to the solar panel and increase the efficiency and lifespan of your solar energy system installed.

As a customer, this might seem a lot and a tedious task but don’t worry, we at Fenice Energy take care of this analysis and provide you with the best design solution.

To begin with, our website www.feniceenergy.com has something called a ‘Fenice Energy solar calculator’ wherein you enter some of the details asked and we tell you how much energy can be saved if you switch to a solar plant.

And then, of course, we also have a detailed form that you can fill out on the website to get an estimated quote. This is to ensure you are given an average cost to bear in mind before the installation.

6 Steps to Install Solar Panels

Stepping right into the step-by-step guide, here are the quick 6 stages you’ll be taken through, right from the time you reach out to us, up until the installation is complete.

1. Consultation

For all those of you who think solar panel installation would be a long process and there are chances, you may change your mind about it amid the entire process, this step is the most crucial one for you. To save your  time and energy, we offer a free consultation wherein you will be informed:

1. What your initial costs are

2. What kind of electricity will you be consuming

3. What amount you’d be saving in your ROI

2. Site survey

Post the consultation, once you decide to go ahead with us, a site visit will be organized by our team. This step is basically to visit your property in person or virtually, take a look at the space and ensure there is sufficient area for solar panels to be installed that isn’t covered by a tree shade or any obstruction. Post the site visit our team will design an installation that is most suited to your space, bearing in mind the rooftop accessibility, your preference, and other criteria.

3. Financing

For the ones who are worried about the expense of rooftop panel installation, this is a stage that should calm your nerves. If you require financing, we will help and guide you through the loan process. With Fenice Energy, you can easily avail the financing option at an affordable EMI rate. All you need is to click the link and go to the “apply option” and relax. We will provide you with the best possible financing option.

4. Permits & Installation

This stage is where the permits and installation happens. Now, right from the time, the financing bit is cleared, you will be notified via email and text on:

When the panels are packed from our warehouse
Shipped to your address and
Being delivered to you

Once the panels reach your property, you will have the feasibility to select an exact date and time for the installation process to take place. Our team will arrive at the requested date and time and have the panels installed. The installation will be done within a day or so.

Depending on the jurisdiction, installation of a solar PV system may require an electrical permit, net metering approval, a building permit, zoning approval or some combination of these.” Post the installation, we will take care of all the permits and approval documents that are required to get your system up and running as soon as possible.

5. Commissioning

This is the final stage where after all the approvals and net metering connection, the solar plant is connected to the grid and ready to use.

6. Fenice care app

Moreover, Fenice Energy is available to customers post-installation too, if required. With our easy remote tracking application, you can track information at your fingertips and get in touch with us if you have any questions or concerns.

The remote monitoring system helps you to track the following information:

1. Real-time performance of your solar plant

2. Identify irregularities

3. Data storage

4. Track savings accurately

The onboarding kit we provide you with will have:

Do’s & Don’ts

A cleaning guide to ensure your panels are as good as new years from now
Details on warranty
Our contact information
Wrapping Up

So there you have it, in 6 steps you can now have your solar panels installed without worrying about facing any surprises. We hope we were able to break your myth about the time, effort, and money involved in installing a solar panel system.

For more information, please visit our website www.feniceenergy.com

Categories
Solar Solar Energy

Why do we need a shadow-free area for solar installation?

For optimal performance, a solar power plant needs an unobstructed area bathed in sunlight. This area, known as the daylight zone, must be free from shadows caused by objects like pipes, trees, or walls, which can reduce power output. The Ministry of New and Renewable Energy (MNRE) recommends allocating 10 square meters of solar area per kilowatt of solar plant capacity. Despite this, many consumers remain unaware of these considerations and the precautions necessary for installation.

Relieving Shadows can be a Curse for Solar Panels

Shadows on solar panels may seem harmless, but they can have significant repercussions. Here’s why:

Shadows can damage the panel: When certain cells in a solar panel are shaded while others are not, a phenomenon known as “partial shading” occurs. This can cause “hot spots” where the shaded cells become reverse-biased, potentially damaging the panel over time.

Efficiency will go down: Solar shadow can significantly reduce efficiency by obstructing sunlight, which is essential for generating electricity. Even a small amount of shading can lead to a notable decrease in power output.

Concerns with net metering: In grid-connected solar systems, net metering allows consumers to sell excess energy back to the grid. However, shadows reducing the panel’s output can result in lower energy production, impacting the benefits of net metering.

Need for Proper Placement: To mitigate the impact of shadows, solar panels must be strategically placed in shadow free areas with maximum sunlight exposure throughout the day. You may have to carefully consider the factors such as surrounding buildings, trees, and other potential sources of shade.

Warranty issue: Many solar panel warranties may become void if panels are installed in a shadow area or are subjected to prolonged shading. This can leave you unprotected in case of panel damage or malfunction.

Understanding the detrimental effects of shadows on solar panels is crucial for us to make informed decisions about installation and maintenance. By addressing shading issues proactively, we can maximize the efficiency and longevity of our solar power systems.

Solutions to Avoid Shadows Over Solar Panels

Solar panel shadow can be a nuisance, but with the right solutions, you can maximize sunlight exposure and enhance your solar power system’s performance. Here are some effective strategies:

Trees and vegetation trimming: Trees and overgrown vegetation are common sources of shading. Regularly trimming branches and foliage can help prevent obstructing shadows on solar panels.

Placing the panel strategically: When installing solar panels, consider the sun’s path throughout the day and the potential sources of shade. Position panels in areas with minimal obstruction, such as rooftops or open fields, to maximize sunlight exposure.

Consider using tilted mounting systems: Tilted mounting systems allow solar panels to be angled towards the sun. It optimizes their exposure and reduces the likelihood of shadows falling on them, especially during mornings and evenings when the sun is lower in the sky.

Coupling with microinverters or power optimizers: Microinverters or power optimizers can mitigate the impact of shading by optimizing the performance of individual solar panels. Unlike traditional string inverters, these devices allow panels to operate independently, minimizing the effect of shading on the entire system.

Opt for shade analysis tools: Before installing solar panels, conduct a shade analysis using specialized tools or software. This analysis helps identify potential shading issues. You can adjust the panel placement or system design to maximize sunlight exposure.

Ensure regular maintenance: Keep surrounding structures, such as buildings and utility poles, in good condition to prevent unexpected shadows from obstructing sunlight onto your solar panels. Regular maintenance can also include cleaning panels to remove dirt and debris that may cause localized shading.

By implementing these solutions, you can minimize the impact of a shadow panel and optimize the performance of your solar power system for maximum energy generation.

Shadows Can Seriously Hamper the Performance of Solar Panels

Understanding the impact of shadows on solar panels is vital for anyone considering harnessing the power of solar energy. Area of shadows may seem innocuous, but they can significantly hamper the performance and efficiency of solar panels, ultimately affecting the energy output of your system.

Remember, every ray of sunlight counts when it comes to generating clean, renewable energy. So, whether you’re a homeowner looking to reduce your carbon footprint or a business seeking to cut energy costs, optimizing your solar panel setup for minimal shading is key to reaping the full benefits of solar power. Embrace the sun’s energy by making informed choices, and together, we can shine a brighter future powered by clean, sustainable solar energy.


Categories
Solar Solar Energy Solar Knowledge

National portal for rooftop solar

हिंदी में पढ़े

Exploring the Events that Can Lead India to Attain Free Electricity

Prime Minister Narendra Modi illuminated our path towards a brighter, cleaner future with the launch of the Solar Subsidy Scheme in February 2024. This visionary scheme aims to empower households across the nation. We can embrace solar energy as it is more accessible and affordable than ever before. The national portal for solar rooftop mentions- the program’s generous provisions, where households benefit from substantial financial assistance. Under the new scheme, you will receive up to 30,000 rupees for a 1 kW solar system, 60,000 for a 2 kW system, and a whopping 78,000 for 3 kW or higher. If you believe in not just saving money but investing in a sustainable future this scheme is for you.  And the process of attaining national rooftop solar couldn’t be simpler. Through a user-friendly national rooftop portal, households can apply for subsidies and even choose their preferred solar vendor for installation. Plus, with collateral-free, low-interest loans available at around 7%, your financial burden is significantly reduced. take control of our energy usage.

Understanding how this Scheme will Help Indians

PM Modi’s vision extends to every corner of the country through the national solar portal, including rural areas. Model Solar Villages will serve as beacons of inspiration, showcasing the potential of national rooftop solar in even the most remote regions. With subsidies deposited directly into your bank accounts and the integration of stakeholders through a national portal of rooftop solar, convenience and transparency are paramount. This isn’t just another government scheme—it’s a revolution in the making. By incentivizing urban local bodies and panchayats to promote national solar rooftop options, the PM is catalyzing a grassroots movement towards sustainability. And with India’s ambitious goal of generating 500 GW of renewable energy by 2030, rooftop solar is poised to play a pivotal role in achieving that vision. You can also get these details from the national portal for rooftop solar in hindi. The senior program lead at the Council on Energy, Environment, and Water rightly points out that national rooftop solar will reduce costs and offer energy security for future generations. With capacity additions in solar energy nearly doubling in recent years, the momentum is undeniable. The sun is shining on India’s future, so make sure you are ready for this change.

Let’s Delve on why this Scheme is Essential

We need a Solar Subsidy Scheme for several reasons, each tied to the overarching goals of sustainability, energy independence, and economic empowerment. Easy access: Many of you, especially those in rural and remote areas, still lack reliable electricity. The Solar Subsidy Scheme on the national solar rooftop portal in hindi, makes solar energy solutions more financially feasible for households. Under this, you and your community can enjoy access to reliable power. Affordable scheme: The upfront cost of installing solar panels can be overwhelming for many of us. By providing subsidies and incentives on the national solar rooftop portal, the scheme reduces the financial burden. Hence, solar energy is more affordable for a wider range of people. A green future: You might be informed about India being the world’s largest contributor to greenhouse gas emissions. By promoting the adoption of solar energy, the scheme helps us reduce the nation’s carbon footprint and mitigate the impacts of climate change, benefiting not only Indians but the global community as well. The Solar Subsidy Scheme addresses critical needs and priorities for Indians. By incentivizing the adoption of solar energy, we can enjoy benefits for individual households and contribute to India’s broader development objectives.

A Few Things You Should Know about the Solar Subsidy Policy

The Solar Subsidy Policy aims to achieve clean and renewable energy sources for us, particularly through the national portal solar. Here’s a breakdown of the key provisions: Dependability of subsidy rates: The subsidy rates mentioned apply to all applications registered on the national solar rooftop portal until further notice. You will get the subsidies after clearance by DISCOM upon successful commissioning and installation of the solar metering system. The eligibility test: You will get the subsidies by applying through the national portal solae after the launch date (30.07.2022). If you are a consumer or beneficiary only then submit the applications, vendors won’t be able to participate. In case, vendors try to apply, punitive action may be taken against them for attempting to submit applications. Installation process for solar panels: To avail of subsidies, hire registered vendors of the concerned DISCOM. This is mentioned in the national solar rooftop portal guidelines issued by MNRE. Therefore, if you are getting solar panels/modules indigenously manufactured, go right ahead. Calculating the subsidy: You can calculate the subsidies based on the total solar module capacity, solar inverter capacity, or capacity approved by DISCOM, whichever is lower. An important notice: Just submitting the claims on the national portal rooftop solar does not guarantee receipt of subsidies. Your procedures must comply with MNRE guidelines. If you submit false claims or use forged documents it will result in strict action as per prevailing laws. 

Curious About the National Portal for Rooftop Solar Cost Structures? 

Let’s break it down in a way that’s easy to understand:

Allowed Capacity Subsidy Alotted
For Up to 3 kW Rs. 14588/- per kW 
Above 3 kW and up to 10 kW Rs. 14588/- per kW for first 3 kW and then Rs. 7294/- per kW
Above 10 kW  Rs. 94822/- fixed

*This data clarifies the subsidies being provided. But, if you have any confusion, consult a financial adviser for more details. So, we can conclude that for installations with a capacity of up to 3 kW, you’re eligible for a subsidy of Rs. 14,588 per kW. This means you’ll receive financial assistance for each kilowatt of solar power generated, helping to offset the initial investment. If your installation exceeds 3 kW but is still within the 10 kW range, the subsidy structure changes slightly. You’ll still receive Rs. 14,588 per kW for the first 3 kW. After that, the subsidy is reduced to Rs. 7,294 per kW. This tiered approach ensures that larger installations still benefit from financial support, albeit at a slightly lower rate. Planning a larger-scale solar installation above 10 kW? You’re in luck! You’ll receive a fixed subsidy of Rs. 94,822. This generous subsidy provides a significant boost to offset the costs associated with larger solar projects. Whether you’re considering a small residential installation or a large commercial venture, these subsidies make solar power more accessible and affordable for everyone. By harnessing the abundant energy of the sun, you will be able to invest in a sustainable future for your loved ones. So go ahead, take the plunge into solar energy, and watch as your savings grow along with your environmental impact.

Taking A Step Towards Green Energy Transformation for Vendors

Are you a vendor passionate about promoting solar energy solutions? Here’s your chance to join the movement towards a cleaner, greener future! By registering with your respective DISCOM through the national portal rooftop solar, you can play a vital role in driving India’s solar revolution. Here’s how it works: How you can apply: Simply apply, along with a declaration in the specified format available at the national solar rooftop portal, to your Division/Circle level DISCOM. Along with your application, deposit a Performance Bank Guarantee (PBG) of Rs. 2,50,000/- valid for at least five years. How to get the empanelment: Your name will be included in the list of empanelled vendors within a month of submitting your application. The DISCOM updates this list every month, ensuring transparency and accessibility for consumers. Uploading details on the national rooftop solar portal: Once empanelled, your details will be uploaded onto the national portal rooftop solar by DISCOM. You’ll receive a registration mail, allowing you to log in using your PAN number and registered mobile number. This gives you access to enter your product rates and contact details, which will be visible to consumers submitting rooftop solar applications to DISCOM.

Please enable JavaScript in your browser to complete this form.
Full Name
Please enable JavaScript in your browser to complete this form.
Full Name
Please enable JavaScript in your browser to complete this form.
Full Name