fbpx
Categories
Micro_Inverter

Revolutionizing Solar Energy: Exploring the Microinverters

Revolutionizing Solar Energy: Exploring the Microinverters

Introduction

In the dynamic landscape of solar energy, technological advancements continually push the boundaries of efficiency and reliability. Among these innovations, microinverters have emerged as game-changers, reshaping the way we harness the power of the sun. In this comprehensive exploration, we will dissect the key components of microinverters, understanding how these devices contribute to the longevity and effectiveness of solar systems.

The Evolution from String Inverters to Microinverters

Traditionally, solar systems employed string inverters, which convert direct current (DC) generated by solar panels into alternating current (AC) for use in homes or businesses. While string inverters have been the backbone of solar installations for years, they are not without their limitations.

String Inverters: A Single Point of Failure

One of the notable drawbacks of string inverters is their vulnerability to a phenomenon known as the “single point of failure.” In a string inverter system, all solar panels are connected in series, meaning that if one panel underperforms or encounters issues, the entire string’s performance is compromised. This limitation could lead to significant energy losses and requires meticulous maintenance to identify and rectify problems promptly.

Enter Microinverters: A Paradigm Shift

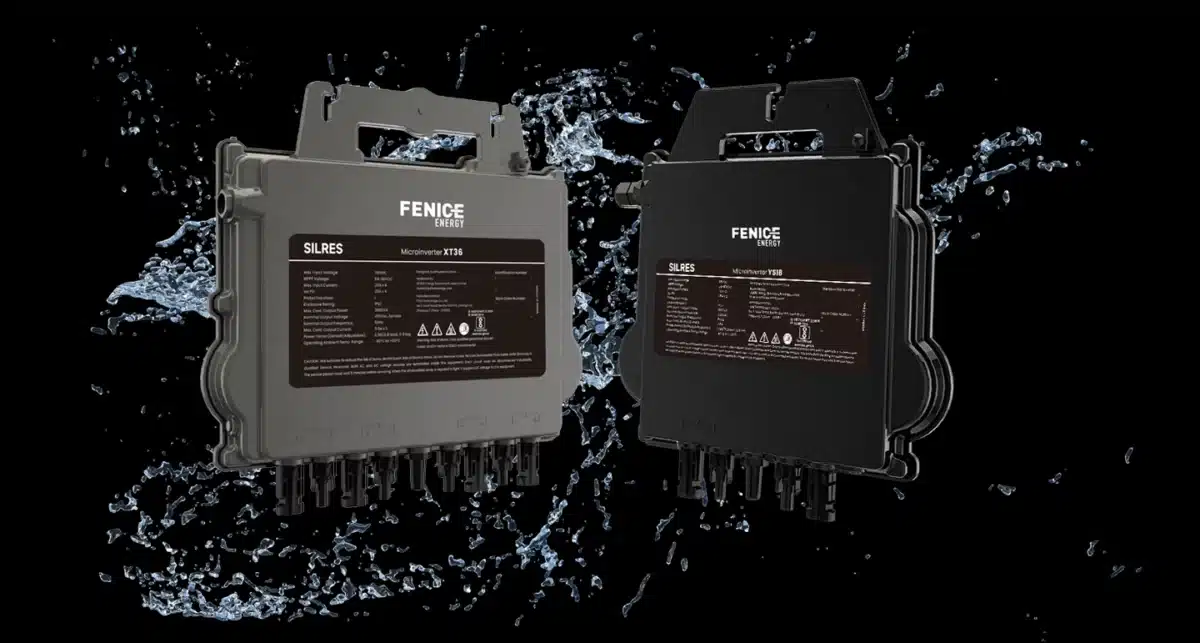
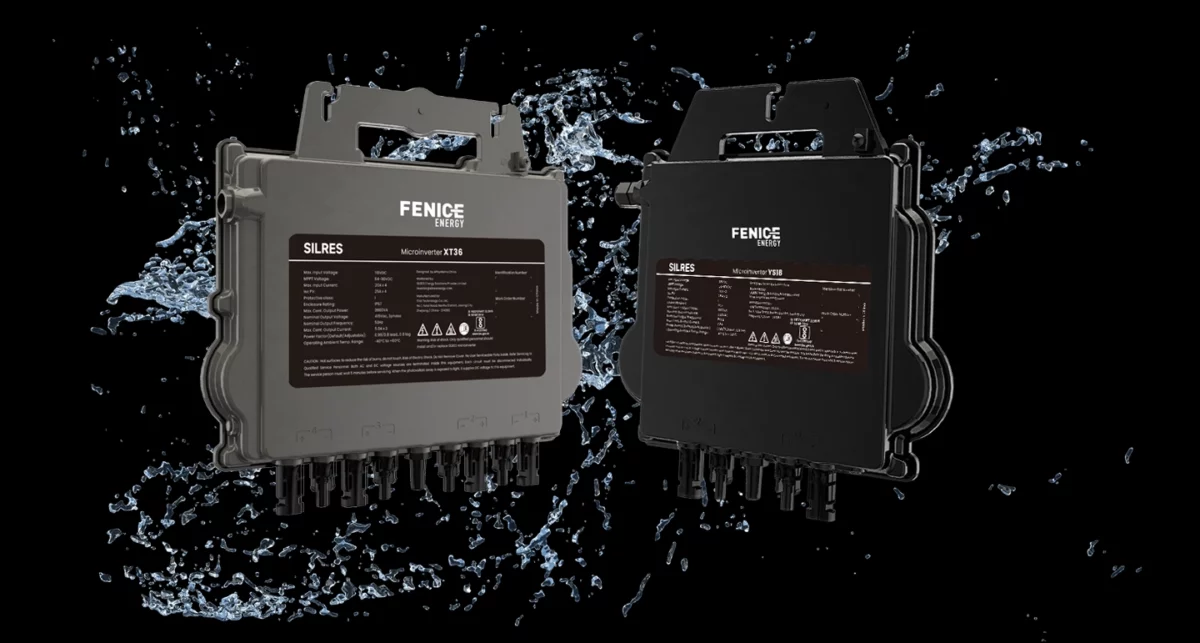
Microinverters mark a paradigm shift in solar energy systems. Unlike string inverters that handle the entire solar array, microinverters operate at the module level. Each solar panel in a microinverter system is equipped with its own microinverter, enabling independent and optimized power conversion. Let’s delve into the components that make microinverters a revolutionary force in the solar industry.

Key Components of Microinverters

DC to AC Conversion at the Module Level:

The fundamental purpose of a microinverter is to convert the DC power generated by each solar panel into AC power right at the module level. This individualized approach eliminates the single point of failure issue seen in string inverter systems. Even if one panel experiences shading or malfunctions, the rest of the system operates unaffected.

Power Electronics:

Microinverters leverage sophisticated power electronics to perform the DC to AC conversion. These electronics include high-efficiency semiconductors and capacitors that ensure minimal energy losses during the conversion process. The result is a more efficient and reliable power output from each solar panel.

High Voltage Handling:

Microinverters are designed to handle high voltages, which is crucial for optimizing power production. Higher voltages allow for reduced energy losses during transmission over power lines, ensuring that the electricity generated reaches its destination with minimal waste.

Advantages of Microinverters

Enhanced Energy Harvesting:

By operating at the module level, microinverters ensure that each solar panel performs optimally. This leads to increased energy harvesting, especially in scenarios where shading or panel degradation might affect traditional string inverter systems.

Durability and Longevity:

Microinverters are built to last, often with warranties extending up to 25 years. This longevity is a testament to the robust design and quality components used in their construction. With fewer points of potential failure, microinverter systems offer increased durability and reliability.

Module-Level Monitoring:

Microinverter systems provide detailed, real-time monitoring at the module level. This granular monitoring capability allows for quick identification of underperforming panels, enabling timely maintenance and maximizing the overall efficiency of the solar array.

Microinverters vs. String Inverters: A Comparative Analysis

Module-Level Optimization:

Microinverters shine in scenarios where each solar panel might experience varying conditions, such as shading or different orientations. String inverters, on the other hand, are only as efficient as the least performing panel in the string.

Scalability and Flexibility:

Microinverter systems offer greater scalability and flexibility in system design. Additional panels can be easily added without the constraints imposed by string configurations, providing a modular and adaptable solution for various installations.

Safety Considerations:

Operating at a lower voltage compared to string inverters, microinverters enhance the safety of solar installations. This characteristic makes them particularly suitable for residential applications where safety is paramount.

Conclusion

As we continue to witness the evolution of solar energy technology, microinverters stand out as a transformative force in the industry. By addressing the limitations of traditional string inverters and offering a more efficient, reliable, and scalable solution, microinverters have become integral components in modern solar systems.

With warranties extending up to 25 years and the ability to optimize power production at the module level, microinverters are not just components; they are catalysts for the widespread adoption of solar energy.

As we look to a future powered by sustainable and clean energy, the role of microinverters in shaping that future cannot be overstated. Their individualized approach to power conversion is not just a technological leap; it’s a giant leap towards a greener and more sustainable energy landscape.

Categories
Micro_Inverter

Tips to Choose the Right Inverter for Homes: 12V or 24V

हिंदी में पढ़े

When setting up a power system for your home, one of the crucial decisions you’ll face is choosing the right inverter. Inverters are essential for converting DC (direct current) power from sources like solar panels or solar batteries into AC (alternating current) power that can be used to run household appliances. A common dilemma homeowners encounter is whether to opt for a 12 volt or 24volt inverter. In this guide, we’ll explore the key factors to consider when making this decision, including inverter efficiency, battery bank setup, cabling cost, and the overall performance of your power system to find out which is better 12v or 24v inverter. Table of Contents

Understanding Inverter Voltage: 12V or 24V

Before diving into the details, it’s important to grasp the fundamental difference between 12V and 24V inverters. The voltage rating (12V inverter vs 24V inverter) indicates the DC input voltage that the inverter can handle. While both types serve the same purpose, they have distinct advantages and considerations.

Inverter Efficiency: A Critical Factor

One of the primary considerations when choosing a 12V vs 24V inverter is efficiency. Inverter efficiency refers to how effectively the inverter converts DC power into AC power. Generally, higher voltage inverters tend to be more efficient. 12V Inverter Efficiency: 12V inverters are known for being less efficient compared to their 24V counterparts. This is because they need to convert a lower voltage DC source to AC power, which can result in more energy losses during the conversion process. 24V Inverter Efficiency: 24V inverters, on the other hand, are inherently more efficient as they work with a higher input voltage. This efficiency can translate into lower energy losses, reduced heating, and ultimately, better performance. In practical terms, if you are aiming for a power system that optimizes energy conversion and minimizes waste, a 24V inverter is a preferable choice.

Battery Bank Configuration: 12V vs. 24V

Your choice of inverter voltage is closely linked to your battery bank configuration. Batteries store the DC power needed to run your inverter, and the voltage of the battery bank should match the inverter’s input voltage. 12V Battery Bank: If you opt for a 12V inverter, you will need to connect multiple 12V batteries in series to create a battery bank that matches the inverter’s voltage. While this configuration can work for smaller systems, it may lead to challenges when you need to scale up your power system. 24V Battery Bank: Choosing a 24V inverter simplifies the battery bank configuration. You can achieve the required voltage by connecting fewer batteries, reducing both the cost and complexity of the setup. Moreover, a 24V battery bank can support larger systems with ease.

Cabling Cost and Size

The choice between a 12V and a 24V inverter also affects the cost and size of the cabling used in your power system. Cables play a crucial role in transmitting power from the battery bank to the inverter and from the inverter to your home’s electrical panel. Cabling Cost for 12V Inverters: With a 12V inverter, you may need thicker and more expensive cables to accommodate the higher current required due to the lower voltage. These cables are essential to minimize voltage drop and ensure efficient power transfer. Cabling Cost for 24V Inverters: 24V inverters require smaller and more affordable cables because the higher voltage reduces the current needed for the same power output. This can result in cost savings, especially for larger installations.

Inverter Size and Power Output

Inverter size is another key consideration when choosing between a 12 volt and a 24 volt inverter. The size of the inverter determines its capacity to handle power loads. 12V Inverter Size: 12V inverters are typically available in smaller sizes and may have limitations in terms of the maximum power they can supply. This makes them more suitable for smaller residential systems with lower power demands. 24V Inverter Size: 24V inverters are available in a wider range of sizes, including larger capacities that can meet the needs of larger homes or systems with higher power requirements. They offer greater flexibility when it comes to scaling your power system.

48 Volt Option

While the choice between 12V and 24V inverters is common, there is also a 48V option available. A 48V inverter is even more efficient than 24V inverters because it operates at an even higher input voltage. However, it’s important to note that using a 48V inverter requires configuring a 48V battery bank, which can be more complex and expensive than a 24V system. 48V inverters are typically reserved for larger, high-demand applications.

Conclusion

In summary, the decision between a 12V and a 24V inverter hinges on several factors, including inverter efficiency, battery bank configuration, cabling cost, inverter size, and power requirements. For most residential applications, a 24V inverter is a practical choice due to its higher efficiency, simplified battery bank setup, cost-effective cabling, and flexibility in handling various power loads. Ultimately, the best inverter for your home depends on your specific needs, budget, and the size of your power system. It’s essential to carefully assess your requirements and consult with a professional to ensure that your chosen inverter voltage aligns with your overall power system goals. With the right inverter selection, you can enjoy reliable and efficient AC power in your home while harnessing the benefits of renewable energy sources such as solar panels and battery banks.

Categories
Micro_Inverter

What Size Inverter Will Run a Home?

हिंदी में पढ़े

Few disruptions like power outages are no questions but are universal frustrations. Whether you’re in the midst of a meeting call or simply enjoying downtime, sudden power outages can ruin your plans. You can ensure that your home remains powered even when the grid fails. But how? An inverter is a device that inverts electricity from one source to another so that your gadgets can work properly, even during a power outage. This comprehensive guide will help you select the right inverter capacity for your home. Before diving into the intrinsic details of the inverter, it’s important to understand the fundamentals.

What is an Inverter? Why is it Important?

An inverter is an electronic device that acts as a bridge between stored energy in the battery and the electricity required to power the household appliances when there is a sudden disruption, like a power outage. Here’s how it works: While the primary power supply is available, the role of the inverter is to store this available energy for later use. When a power outage occurs, it converts stored Direct Current (DC) energy from the battery into Alternating Current (AC) electricity. This AC is what is required for your appliances to operate effectively. In simple terms, an inverter ensures that your appliances can function smoothly by providing uninterrupted electricity even when the power grid is down.

How to Determine the Inverter Capacity?

Choosing the inverter capacity should be a well-thought-out decision. You can’t just pick the one with the highest rating or the best price. Inverter size, commonly referred to as an inverter capacity, ensures the amount of power to be delivered at any given time, making it an essential factor in choosing the suitable unit for your home use. The two most important aspects of inverter size are continuous power rating and maximum power.

  • Continuous power rating or continuous rating indicates the maximum power the inverter can provide without experiencing a drop in performance or overheating over an extended period of time.
  • Maximum power, commonly referred to as surge power or peak power, reflects the inverter’s ability to supply peak power above its continuous rating for a short period of time.

What is the Right Inverter Capacity Required for Home Use?

Well, it depends on your home’s power requirements during the power outage. Here are the 3 steps to determine the right inverter capacity for your home.

Step 1: Calculate Your Total Power Requirements

The first step is to calculate your total power requirements, which is the sum of the appliances’ voltages. This involves listing all the appliances and devices you intend to power. Consider all the essential items like lights, fans, and refrigerators, as well as non-essential items like computers and televisions.

Step 2: Choose Inverter Efficiency

Now, consider the inverter efficiency to calculate the voltage and current rating of the inverter your home needs. In India, the ideal inverter efficiency ranges from 60% to 80%, and the total power requirement is divided by the power factor of the appliances. This will give you the ideal inverter size right for your home.

Step 3: Calculate Inverter Battery Capacity

Now, when buying an inverter, you also need an inverter battery. Below is the formula required to calculate the inverter battery capacity. Inverter Battery Capacity = (Total Power Requirement) X (Backup Hours – Duration of power cut/ duration you need the inverter battery to supply power) / (Battery Voltage in Volts (12V)) Besides, specific safety measures must be considered to handle unexpected situations like an increase in power demand or the possibility of adding more appliances to the system. A 10-20% safety margin is typically recommended. For example, if your total load is 1200 watts, then you should consider an inverter size of 2400 watts.

Practical Example of Selecting an Inverter Size

Let’s consider an example to illustrate the process of finding the right inverter size needed to run a house. Suppose you have the following appliances with indicated power,

  • Laptop – 85W
  • 4 Fans – 300W
  • 3 Tube lights – 200W

Note: You can find this information on the label of the appliance. If the rating is given in amps and volts, use this formula to calculate the watts: Power (W) = Voltage (V) X Current (A) To determine this, add continuous power requirements of the appliances that you intend to power, Total continuous power, = 85 watts + 300 watts + 200 watts = 585 watts (0.585 KW) Now divide the power requirement by 0.9 (power factor) = 585 watts/0.9 = 650 VA This is the ideal inverter right for your home. Now, here is how you calculate the inverter battery capacity, = (585 watts x 2 backup hours) / (12 volts) = 97.5 Ah This is the ideal inverter battery capacity for your home. This is all you need to find the right inverter size for your home use. The essentials are understanding the continuous power ratings and surge power and calculating the total power requirements.

If you are still looking for the right inverter size for your home, check out our microinverters that are designed for maximum energy output for residential or commercial solar installations.

Categories
Batteries Micro_Inverter Rooftop Solar Solar Solar Panels

5 reasons to go for Lithium-ion-phosphate batteries.

5 reasons to go for Lithium-ion-phosphate batteries.

Do you like interruptions while you enjoy your movie or are busy working on your computer? No! We hate interruptions! this is what you might answer!

To avoid interruption and high energy bills, we have a fleet of solutions which are broadly called storage systems. All of them feature solar battery backup, and some of them feature solar energy as well. Storage systems with solar are known as hybrid solar energy systems, where you get to save your energy bills while consuming electricity without interruption in an eco-friendly way.

But how do you get a continuous energy supply with a hybrid solar energy system?

It is the solar battery(energy storage system) affixed to the solar panels and grid that maintains power regardless of the weather condition and grid failure.

Although many rechargeable batteries are available in the market today, lithium-ion batteries(Li-ion) have made a name for themselves in the market due to their high performance and long lifespan.

The lithium-ion batteries in combination with renewable energy have a great potential to cater for the energy requirement of the people and reduce grid dependence.

But do you know the fact?

Lithium-ion batteries claim to be top-notch reliable and durable batteries but it is true only if they are handled with proper management. We at Fenice Energy, before dispatching the batteries, perform a complete quality check of the cell and solar battery to make sure it is in good condition.

Advantages of Lithium-ion batteries?

Higher Depth of Discharge (DoD): Depth of discharge is the amount of the stored energy in the solar battery that has been used, as compared to the total capacity of the battery. DoD for a lithium battery is 90-95% whereas for a lead acid battery is around 50-80%. This means that the Li-ion solar battery’s actual energy capacity is closer to the nameplate value of its energy capacity.

Higher energy density: Solar battery energy density refers to how much power a solar battery can hold concerning its physical size. In homes with limited space, lithium-ion batteries are a great option since they are space-saving (taking only 20-30% of the space) and store more power than lead-acid batteries per square foot.

Less Maintenance: Lithium-ion solar batteries do not require as much maintenance as lead-acid batteries. Fenice Energy’s batteries also have WiFi-based monitoring which makes it easier to monitor the systems through the app.

Battery Lifespan: These batteries are long-lasting due to their high DoD and minimal charging and recharging requirements. Fenice Energy’s Lithium-ion batteries have a minimum warranty lifespan of about 10 years.If we assume 1 cycle/day then the lithium-ion batteries have a lifespan of around 17 years.

Higher Efficiency: Compared to other types of batteries on the market, lithium-ion batteries have a round-trip efficiency greater than 95%.

Are lithium-ion solar batteries for residential users?

In general, lithium-ion solar batteries are the best solar energy storage system for everyday residential use because they take up little space while storing a substantial amount of energy. They also have a sleek IP55 enclosure and do not have exposed wiring, making the system safer.

Furthermore, their high DoD allows you to store more energy.

The long life of lithium-ion batteries means that the solar battery won’t need to be replaced as often as a lead acid battery. They also allow you to extract, store and release more energy (from your solar panels) due to their higher efficiency. With a lithium solar battery connected to your on-grid or off-grid solar energy system, you can get a continuous power supply.

Do you know LFP (lithium iron phosphate) batteries are more reliable than simple Li-ion batteries?

LFP batteries are a type of lithium-ion battery with very stable chemistry. LFP batteries consist of lithium iron phosphate as a cathode that gives the solar battery a longer life span with zero maintenance. Additionally, the LFP batteries don’t release any toxic or dangerous gases during charging or discharging and have better thermal management.

When it comes to safety and hot regions, LFP batteries are the best option.

Our Fenice Energy LFP batteries require zero maintenance and come with a 10-year product warranty on the solar battery.

In case you want an uninterrupted power supply with safety as a priority while reducing your electricity bills in an environmentally friendly way, then Contact us. Today!

Our technical team will be happy to help you get the right solar energy system for your location.

Categories
Micro_Inverter Rooftop Solar

Can my solar panel work without an inverter?

A big no! If you are someone considering switching to a solar energy system for your home (while having appliances that work on AC power) but without an inverter, then you will probably end up with the same old electricity bill. Yes, without an inverter, your solar installation will have no meaning.

If you want to use solar energy to power your home, you might wonder why an inverter is so important. Our article provides a detailed explanation of the type, working, and importance of inverters in solar energy systems.

Solar Installation Process

Solar installations not only consist of solar panels but also various other components. If we consider solar panels as the heart of the solar energy system, then the solar inverter is the brain.

The solar panels consist of solar cells that absorb the solar radiation using photovoltaic principles and convert it into Direct Current (DC). But most appliances at our home/commercial space work on Alternating Currents (AC). So, directly connecting household appliances to solar panels is almost never possible.

Why is Inverter Important?

An inverter acts as a bridge and converts the direct current produced by the solar panels into alternating current, which is further supplied to the connected load. It also ensures frequency synchronisation with the connected load. In India, we typically operate at 230V, 50 Hz frequency.

You might wonder, ‘How can an inverter convert the voltage from one level to another at the same frequency?’ The inverter consists of a transformer which helps in converting the voltage from one level to the other. However, with the evolving technology, the transformer-less inverter is gaining popularity in the market as it overcomes the shortcomings of transformer-based inverters.

Types of Inverters

Solar panel inverters use a computerised multi-step process to convert the DC output of a solar panel into high-frequency DC using a boost converter, which is further converted into AC as per the grid/load requirement using an H-Bridge converter and oscillator.

So, now that we know how an inverter works let us dive deep into the various types of inverters available in the market.

In the market, we have the following inverter that can be connected to the solar panel:

  • String Inverter
  • Micro Inverter
  • Central Inverter

String Inverter

String inverters are in high demand as they are priced reasonably and have durable technology. In this, multiple panels are connected to a single-string inverter. However, even if a single panel gets damaged or comes under a shadow, it may degrade the performance of all the connected panels.

Micro Inverter

As the name indicates, this type of inverter is mostly used where space is a factor over cost or in case of uneven shading in small solar installations. These inverters are placed on every solar panel, thus independently converting DC to AC supply. In this, if any panel is shaded or damaged, the performance of the other panels is not affected.

Central Inverter

Central inverter is similar to a string inverter with a high-capacity range, needing only one large inverter for the entire plant/section of the plant. They are preferred for large utility-scale applications.

Solar installation without an inverter is not a viable alternative unless you exclusively have DC loads at your site. Choosing the proper inverter is critical to ensure optimum generation and savings and relies on several factors, such as the type of inverter, rating, and compatibility with the solar panels.

We hope this article will give you enough information about inverters and their types. If you are interested in learning more about inverters and what inverter suits your location, contact us.

We at Fenice Energy ensure to provide you with the right type of design that suits your needs and pocket.

Categories
Micro_Inverter

Microinverters: Do you really need it?

What are Microinverters? 

In many cases, experts may suggest installing solar panels with micro inverters. Before you decide to install one, you must ask what is a microinverter? Microinverters are compact devices that stay mounted directly onto individual solar panels. They handle the critical task of converting the direct current (DC) electricity produced by each panel into the alternating current (AC) electricity that powers your home. This conversion process is essential because solar panels generate electricity in DC form and most household appliances require AC electricity to operate. By integrating microinverters into your solar setup, you ensure that the energy harvested by each panel is transformed into a usable form.

Are Micro Inverters Worth it?

There are many benefits of installing solar panels with micro inverters. Here are a few:

Individual Panel Optimization

Micro inverters in India optimise the performance of each solar panel independently. Unlike traditional string inverters, microinverters ensure that each panel operates at its maximum efficiency. This means that shading, dirt, or malfunctions affecting one panel won’t impact the output of the entire system. As a result, it will result in higher overall energy production.

Real-Time Monitoring

Many microinverter systems offer built-in monitoring capabilities. This allows homeowners to track the performance of each panel in real-time. Through user-friendly interfaces or smartphone apps, you can easily monitor energy production, identify potential issues, and assess the overall health of your solar system. Therefore, homeowners can address any issues promptly and maximise system uptime.

Flexible Installation

Microinverters simplify the installation process and offer greater flexibility compared to traditional inverters. Each microinverter is installed directly on its corresponding solar panel. This eliminates the need for complex string configurations or positioning considerations. It will allow you to customise your solar array to fit in the available roof space.

Scalability

With microinverters, you can easily expand your rooftop solar installations over time. Since each panel operates independently with its own microinverter, adding new panels to an existing system is straightforward. It will allow you to start with a smaller system and gradually expand it as your energy needs. You do not have to worry about costly upgrades.

Safety Features

Microinverters operate at lower voltages compared to traditional inverters. Therefore, it will reduce the risk of electrical hazards during installation, maintenance, and operation. Additionally, the modular design of microinverter systems minimises the impact of potential failures. If one microinverter malfunctions, the rest of the system remains unaffected. You can ensure continuous energy generation and system reliability.

High Reliability

Microinverter systems enhance the reliability of solar energy installations. Since each panel operates independently, the failure of one microinverter does not compromise the performance of the entire system. This ensures consistent energy production over time. Even during failures or adverse environmental conditions, you will not face power cuts.

Optimised Energy Harvesting

Microinverters incorporate Maximum Power Point Tracking (MPPT) technology for each individual panel. MPPT algorithms continuously adjust the electrical output of each panel to maximise energy harvesting, even under changing environmental conditions. By optimising the power output of each panel, microinverters ensure that you can extract the maximum energy from solar arrays. It will enhance the overall system efficiency.

Compatibility with Complex Roof Configurations

Microinverters are well-suited for installations on roofs with complex configurations, shading issues, or panels oriented in different directions. Since each panel operates independently, microinverters mitigate the impact of shading or orientation problems. You can ensure optimal energy production even in challenging environments. This is one of the main benefits that make microinverters a preferred choice for installations.

How to install solar panels with micro inverters?

Installing solar panels with microinverters involves several steps. These steps must be followed to ensure efficient energy production and system safety. 

Assessment and Planning

Before diving into installation, assess your property’s solar potential. Factors such as roof orientation, shading, and local regulations play crucial roles. Conduct a site survey to determine the optimal locations for solar panel placement. Take measurements and note any obstructions that might affect panel placement and performance.

Selecting Equipment

Choose high-quality solar panels and microinverters suitable for your energy needs and budget. Opt for reputable brands known for durability and performance. Ensure compatibility between the panels and microinverters to maximise energy production. Consider warranty, efficiency ratings, and certifications when making your selections.

Acquiring Permits and Approvals

Obtain necessary permits and approvals from local authorities before proceeding with installation. Regulations regarding solar panel installations vary by location, so familiarise yourself with the requirements in your area. 

Preparing the Installation Site

Clean the installation site and ensure the roof surface is structurally sound to support the weight of the solar panels. Remove any debris or obstacles that may obstruct the installation process. If necessary, reinforce the roof or make repairs to ensure a secure foundation for the solar array.

Mounting the Racking System

Install the racking system securely onto the roof following manufacturer guidelines and local building codes. Use appropriate hardware to attach the racking system to the roof structure. Make sure that penetrations are sealed to prevent water leaks. Also, the racking system must be properly aligned and levelled.

Wiring and Electrical Work

Connect the microinverters to the solar panels using the provided cabling according to manufacturer instructions. Pay attention to polarity and ensure proper grounding to comply with electrical safety standards. Then, run wiring from the microinverters to the main electrical panel.

Testing and Commissioning

Once the wiring is complete, conduct thorough testing to ensure proper functionality of the entire system. Test individual components, including panels, microinverters, and electrical connections, to identify any issues or discrepancies. Verify that the system is generating electricity as expected and troubleshoot any problems encountered during testing.

Grid Connection and Final Inspection

Coordinate with your service provider to connect your solar system to the grid. Obtain any required approvals or permits for grid interconnection and net metering arrangements. Schedule a final inspection to ensure compliance with local regulations and safety standards. Once the system passes inspection, you can start enjoying the benefits of solar energy.

Although this may seem like a simple process, it is best to hire experts for the installation. It will eliminate the risk of faulty installations and ensure that you do not face any issues in the future. 


Categories
Green Energy Micro_Inverter Rooftop Solar

How to protect your solar panels from lightning?

In the previous article, we have defined some environmental factors that solar installers are stressed over. During the rainy season, installers are concerned about the storms and lightning impacts as they are the major calamitous failure of the solar panel system. The time and cost incurred in repairing the damage due to the indirect and direct strikes are high, hence prior protection against these damages is worth the investment. The article below describes some of the easy techniques that one can implement to protect against these damages.

Lightning strikes are mostly classified as direct and indirect strikes.

Direct Strikes are severe but rare, it leads to melting of the panels and damage to the inverter, fuses, and cable. It induces high current into the system, thus causing overheating and damage to the system. An indirect strike occurs more often, it creates electromagnetic induction that generates high voltage into the solar system and house. The generated high voltage passes through the system wiring to the components, thus damaging the conductor, solar panels, inverter, and other components connected. But don’t worry! We take steps to help avoid lightning damages to the PV system. Risk analysis and protection against lightning must be done according to the IEC standard (we have further described the IEC standards for protection against lightning strikes) at the designing stage.

Two main solutions to protect against the lightning strike:

1. Grounding 2. Lightning arrestor

Grounding:

Grounding is one of the basic techniques used to divert the path of lightning from the component straight to the ground. For places with occasional lightning strokes, the grounding technique is enough to protect the PV system from lightning and surges (without adding any other protection equipment). Good grounding is very necessary, even if we use lightning arrestors and surge protectors it will work effectively only with proper grounding.

For proper grounding one needs to follow the following points:

1. Check the resistivity of the ground: Electricity flow handling capacity. Article 250 (the article specifies the requirement of grounding and bonding) and article 690.41 (the article specifies solar PV electrical energy system) of the National electrical code (NEC) specify grounding requirements. 2. Interconnect all the PV panels, inverter, controller, and all the other components to the common ground along with the house grounding system to the common earthing point. We need to install one earth pit for the DC side (solar panels, DC distribution box) and one for the lightning arrestor and AC side (inverter, AC Distribution Box). 3. For proper and effective grounding, the use of copper / Aluminium wire / GI strip is highly recommended. The wire/strip used should be free from sharp bends and twists and should be buried in a way such that most of the area comes in contact with moist soil.

Do we need to install other protective equipment to protect against lightning?

Adding protective equipment depends on the location and environmental condition. It is recommended to install additional lightning protective devices under the following circumstances: 1. If the solar panel is installed in the lightning prone location 2. Presence of heavy metal objects such as water tanks, solar thermal heaters, satellite antennas, etc. 3. Length of wire larger than 100m 5. Dry soil with poor conductivity Let us check the lightning protection system in detail. The lightning Protection system is categorised as follows:

External protection systems

External protection systems are used to protect the solar rooftop system from direct lightning strikes. This type of protection system gets activated only when lightning strikes over the solar system, thus protecting solar panels and other equipment associated with it.

1. Air termination system

An air termination system is installed to protect the building from uncontrolled lightning strikes. The system consists of cables, spanned wires, and conductors. A correct design, dimension with more attention towards the corners and edges allows better protection against lightning. Design methods commonly used for air termination systems are: Mesh Method – It is used for the flat roof structure Rolling Sphere – It is the universally used method for all types of structure Protection Angle Method – It is preferred for single masts and finials type structures. For solar energy systems, the protection angle method is recommended.

2. Down conductors

The down conductor act as a conductive connector between air and earth termination systems. It allows the passage of lightning current to the earth termination system and provides the shortest and least resistant path to the current. For proper protection, down conductors should match the following guidelines: The down conductor should offer several short distances parallel current paths. A high voltage insulated down conductor is installed to ensure proper protection and separation distance from other conductive components. Conductors should be evenly distributed. The number of conductors required depends on the rooftop external edges area, so a proper calculation must be done.

3. Earthing termination system

Earthing termination system is installed to avoid voltage-rise in the earthing system, it helps in discharging the surge current to the earth. For effective discharging, it is recommended to use a low-frequency electrode offering a low resistance path to the earth and resistance to corrosion.

Internal Lightning Protection System(LPS)

To protect the building structure against indirect strikes, internal LPS is used. It is done in the following ways:

1. Lightning equipotential bonding –

It reduces the voltage difference by connecting the different isolated parts of the system using conductors or surge protection devices with the help of IEC 60364-4-41 standard(It defines the essential requirements related to protection against electric shock, direct and indirect contact of persons and livestock) Dangerous sparking is prevented by keeping an appropriate distance between the electrical conducting components and lightning protection equipment.

2. Surge (Lightning) protection device –

Surge protection devices are a part of the lightning protection system. The primary function of SPD is to limit transient overvoltages of atmospheric origin below the set hazardous value and divert current waves to the earth to protect the electrical installation system. In solar energy systems, SPDs are installed in ACDBs (AC distribution box) and are inbuilt in Inverters as well. Lightning rods are placed on the building top and are connected to the ground, they help in preventing the surrounding atmosphere from the static charges. In the case of lightning, the developed high current will pass to the ground directly.

IEC standards for lightning protection

The International Electrotechnical Commission (IEC) defines guidelines for all electrical, electronic and other similar technologies. BS EN/IEC 62305 defines guidelines in consideration of lightning protection, it is divided into four major parts: 1. General principle 2. Risk management 3. Physical damage to the structures and life hazard 4. Electrical and electronic systems

Lightning protection for residential rooftop solar consumer – key points

The following points should be taken into consideration while building a lightning protection system for rooftop solar models: 1. Install lightning rod at the topmost point in the location where the solar energy system is installed. 2. The DC connection of the PV system should be kept at a reasonable distance from the metal components on the roof. 3. Ensure AC distribution box and inverter consists of a surge protection device. 4. Make sure down conductors are not rusted(as it increases the resistivity) and earthed properly.

Categories
Micro_Inverter

Choosing the Right Inverter for Your Home: 12V or 24V Hindi

Read in English

अपने घर के लिये चुनें सही इन्वर्टर: 12V या 24V

अपने घर के लिये सही और निरंतर बिजली की व्यवस्था करते समय, सही इन्वर्टर का चुनाव करना बहुत महत्वपूर्ण हो जाता है। सोलर पैनल या बैटरी जैसे ऊर्जा स्रोत डायरेक्ट करेंट (DC) उत्पन्न करते हैं, जबकि घरेलू उपकरणों को चलाने के लिए ऑल्टरनेटिंग करेंट (AC) की आवश्यकता पड़ती है। ऐसे में इन्वर्टर ही एक ऐसा यंत्र होता है, जो DC को AC में बदलकर सही बिजली प्रदान करता है, ताकि हम अपने सभी घरेलू उपकरणों को बिजली से चला पाएं।

हालांकि, इन्वर्टर का चुनाव करते समय, अक्सर यह दुविधा होती है कि 12V या 24V में से कौन सा इन्वर्टर लिया जाए। आपको इन्वर्टर चुनते समय कोई परेशानी न हो, इसलिए हम इस ब्लॉग में इन्वर्टर की क्षमता, बैटरी बैंक सेटअप, केबलिंग लागत और पॉवर सिस्टम के पूरे प्रदर्शन के बारे में विस्तार से जानेंगे।

12V या 24V इन्वर्टर वोल्टेज से क्या मतलब है?

12V या 24V के इन्वर्टर में से कौन सा चुनना चाहिए, इसके बारे में जानने से पहले हमें दोनों के बीच के अंतर के बारे में जानना चाहिए। वोल्टेज रेटिंग (12V या 24V) डायरेक्ट करेंट (DC) इनपुट वोल्टेज को दर्शाते हैं, जिसे इन्वर्टर संभाल सकता है। हालांकि, दोनों ही तरह के इन्वर्टर का उद्देश्य एक ही होता है, लेकिन इनकी आवश्यकता और फ़ायदे अलग-अलग होते हैं।

इन्वर्टर की क्षमता:

12V या 24V या कोई अन्य इन्वर्टर चुनते समय उसकी क्षमता के बारे में विचार कर लेना आवश्यक होता है। इन्वर्टर की क्षमता से यह मतलब है कि इन्वर्टर कितनी अच्छी तरह से डायरेक्ट करेंट (DC) पॉवर को ऑल्टरनेटिंग करेंट (AC) पॉवर में बदल सकता है। आमतौर पर ज़्यादा वोल्टेज के इन्वर्टर अच्छा प्रदर्शन करते हैं।

  • 12V इन्वर्टर की क्षमता: यह बताने की ज़रूरत नहीं है कि क्षमता के मामले में 12V का इन्वर्टर 24V के इन्वर्टर से कम कुशल होता है। ऐसा इसलिए है, क्योंकि ये कम वोल्टेज वाले DC ऊर्जा स्त्रोत को AC में बदलने का कार्य करता है। जिसके फलस्वरूप बदलाव की प्रक्रिया के दौरान अधिक ऊर्जा का नुक़सान हो सकता है।
  • 24V इन्वर्टर की क्षमता: वहीं, 24V का इन्वर्टर स्वाभाविक रूप से बेहतरीन होता है, क्योंकि इसे ज़्यादा वोल्टेज के साथ काम करने के लिए डिज़ाइन किया जाता है। इस वजह से कम से कम ऊर्जा का नुक़सान होता है और सिस्टम भी कम गर्म होता है, जिसकी वजह से उसका प्रदर्शन 12V के इन्वर्टर की अपेक्षा ज़्यादा अच्छा होता है।


ऐसे में जो लोग सौर ऊर्जा या अन्य किसी DC ऊर्जा स्रोत को AC में बदलना चाहते हैं और यह भी चाहते हैं कि कम से कम ऊर्जा बर्बाद हो, उनके लिए 24V का इन्वर्टर एक बेहतरीन विकल्प हो सकता है।

12V और 24V बैटरी बैंक कॉन्फ़िगरेशन:

आप कितने वोल्टेज का इन्वर्टर चुनते हैं, यह पूरी तरह से आपकी बैटरी बैंक के कॉन्फ़िगरेशन के ऊपर निर्भर करता है। आमतौर पर बैटरियां आपके इन्वर्टर को चलाने के लिए आवश्यक DC पॉवर को एकत्र करती हैं और इन्वर्टर की मदद से उसे AC में बदल देती हैं। ऐसे में बैटरी बैंक का बोल्टेज इन्वर्टर के इनपुट वोल्टेज के बराबर ही होना चाहिए। यानी अगर बैटरी का वोल्टेज 12V है, तो इन्वर्टर भी 12V का ही होना चाहिए।

  • 12V बैटरी बैंक: अगर आप अपने घर को ऊर्जा देने के लिए 12V का इन्वर्टर चुनते हैं, तो आपको इन्वर्टर के वोल्टेज से मेल खाने वाली 12V की कई बैटरियों को एक साथ जोड़ना होता है। हालांकि, इस सेटअप की मदद से आपके छोटे घर की बिजली संबंधी आवश्यकताओं को आसानी से पूरा किया जा सकता है, लेकिन जब आपको ज़्यादा पॉवर की आवश्यकता होगी, तब आपको थोड़ी परेशानी हो सकती है। 
  • 24V बैटरी बैंक: वहीं, दूसरी तरफ़ 24V का इन्वर्टर लेने से बैटरी बैंक का कॉन्फ़िगरेशन आसान हो जाता है। इससे सेटअप की लागत कम होने के साथ-साथ परेशानी का भी सामना नहीं करना पड़ता है और कम बैटरी कनेक्ट करके आवश्यक वोल्टेज प्राप्त किया जा सकता है। इसके अलावा, 24V का बैटरी बैंक बड़े सिस्टम को आसानी से सपोर्ट कर सकता है।


केबलिंग की लागत और साइज़:

12V और 24V में से कोई भी इन्वर्टर चुनने से आपके पॉवर सिस्टम में उपयोग की जाने वाली केबल की लागत और साइज़ पर असर पड़ता है। यह बताने की ज़रूरत नहीं है कि केबल बैटरी बैंक से इन्वर्टर तक और इन्वर्टर से आपके घर के इलेक्ट्रिक पैनल तक बिजली संचारित करने के लिए महत्वपूर्ण भूमिका निभाते हैं।

  • 12V इनवर्टर के लिए केबलिंग की लागत: 12V के इन्वर्टर का वोल्टेज कम होता है, इसलिए आपको ज़्यादा करेंट मैनेज करने के लिये मोटे और अधिक महंगे केबल की आवश्यकता पड़ती है। अच्छी क्वालिटी का केबल वोल्टेज ड्रॉप को कम करने और अच्छी तरह से बिजली ट्रांसफ़र करने के लिए बहुत ज़रूरी होता है।
  • 24V इनवर्टर के लिए केबलिंग की लागत: 24V के इन्वर्टर के लिए छोटे और किफ़ायती यानी सस्ते केबल की आवश्यकता होती है, क्योंकि ज़्यादा वोल्टेज की वजह से समान बिजली उत्पादन के लिए उन्हें ज़्यादा करेंट की आवश्यकता नहीं होती है। इस तरह अगर आप बड़े वोल्टेज का इन्वर्टर लगाते हैं, तो आप केबलों पर लगने वाली लागत को थोड़ा कम कर सकते हैं।


इन्वर्टर का साइज़ और पॉवर आउटपुट:

12V और 24V दोनों में से कोई एक इन्वर्टर चुनते समय इन्वर्टर के साइज़ के बारे में सोचना समझदारी भरा कदम हो सकता है। इन्वर्टर का साइज़, बिजली के भार को संभालने की उनकी क्षमता को निर्धारित करता है।

  • 12V इन्वर्टर का साइज़: 12V का इन्वर्टर आमतौर पर साइज़ में छोटा होता है और उसके द्वारा एक सीमित मात्र में ही बिजली उत्पादित की जा सकती है। इस वजह से इस साइज़ का इन्वर्टर कम बिजली की मांग जैसे छोटे घरों के लिए अधिक उपयुक्त होता है।
  • 24V इन्वर्टर का साइज़: 24V का इन्वर्टर बड़ी क्षमता वाला होने की वजह से कई साइज़ में आता है। यह बड़े घरों या जहां बिजली की ज़्यादा आवश्यकता होती है, उसकी ज़रूरतों को बड़ी आसानी से पूरा कर सकता है। इसके साथ ही अगर आपको भविष्य में ज़्यादा बिजली की आवश्यकता पड़ती है, तब आप इसे अपनी ज़रूरत के हिसाब से अपग्रेड भी कर सकते हैं।


48V के इन्वर्टर का विकल्प:

आपकी जानकारी के लिये बता दें कि 12V और 24V का इन्वर्टर ज़्यादातर घरों में उपयोग किया जाता है, लेकिन अब 48V के इन्वर्टर का विकल्प भी आ गया है। 48V का इन्वर्टर, 24V के इन्वर्टर से कहीं ज़्यादा बेहतर होता है, क्योंकि यह और भी ज़्यादा इनपुट वोल्टेज पर काम करता है। हालांकि, इस बात का ध्यान रखें कि 48V के इन्वर्टर का उपयोग करने के लिए आपको 48V के बैटरी बैंक कॉन्फ़िगरेशन की आवश्यकता होती है। ज़्यादा पॉवर होने की वजह से यह 24V बैटरी बैंक सेटअप से ज़्यादा महंगा भी होता है। आमतौर पर 48V के इन्वर्टर का उपयोग ज़्यादा बिजली की मांग वाली जगहों और व्यावसायिक उद्देश्य के लिए किया जाता है।

निष्कर्ष:

संक्षेप में कहें, तो 12V और 24V के इन्वर्टर के बीच चुनाव करते समय आप उसकी क्षमता, बैटरी बैंक कॉन्फ़िगरेशन, केबलिंग की लागत, इन्वर्टर का साइज़ और अपनी बिजली संबंधी आवश्यकताओं को ध्यान में रख सकते हैं। ज़्यादातर लोग घरेलू उपयोग के लिए 24V के इन्वर्टर का ही उपयोग करते हैं, क्योंकि क्षमता के मामले में ये बेहतरीन होते हैं, बैटरी सेटअप में आसानी होती है, केबलिंग की लागत सस्ती होती है और कई तरह के पॉवर लोड को आसानी से संभाला जा सकता है।

हालांकि, आपके घर के लिये कौन सा इन्वर्टर बेहतर होगा, यह आप अपनी आवश्यकताओं, बजट और अपने बिजली सिस्टम के साइज़ के हिसाब से तय कर सकते हैं। अगर आपको समझ में नहीं आ रहा है कि आपके द्वारा चुना गया इन्वर्टर आपके घरेलू उपयोग के लिए सही है या नहीं है, तो आप किसी विशेषज्ञ की सलाह ले सकते हैं। एक विशेषज्ञ आपके घर की बिजली संबंधी आवश्यकताओं का सही से मूल्यांकन करके आपको सही वोल्टेज और सही साइज़ का इन्वर्टर ख़रीदने की सलाह दे सकता है। सही इन्वर्टर का चुनाव करके आप सोलर पैनल और बैटरी बैंक जैसी दोबारा उपयोग किए जाने वाले ऊर्जा स्रोतों का उपयोग कर सकते हैं और बिजली के मामले में आत्मनिर्भर बन सकते हैं।

Please enable JavaScript in your browser to complete this form.
Full Name
Please enable JavaScript in your browser to complete this form.
Full Name
Please enable JavaScript in your browser to complete this form.
Full Name